Panorama allows you to import your past minutes, resolutions and agendas directly under the corresponding tabs ("Minutes", "Resolutions" and "Meetings"), and to add your reference documents to your document centre. Importing minutes, resolutions and agendas is reserved for account owners. Access to the document centre depends on the permissions configured for each member.
We recommend always using PDF format. Your documents will be viewable directly in Panorama, with no download required by your board members.
Step 1: Prepare your files
If your documents are stored in Google Drive, SharePoint or OneDrive, there is no need to download them one by one. Instead, sync your cloud folders with your computer so you can upload files in bulk directly from your file explorer.
- Google Drive: Instructions for Windows and macOS
- SharePoint or OneDrive: Instructions for Windows / Instructions for macOS
Step 2: Import your past minutes, resolutions and agendas
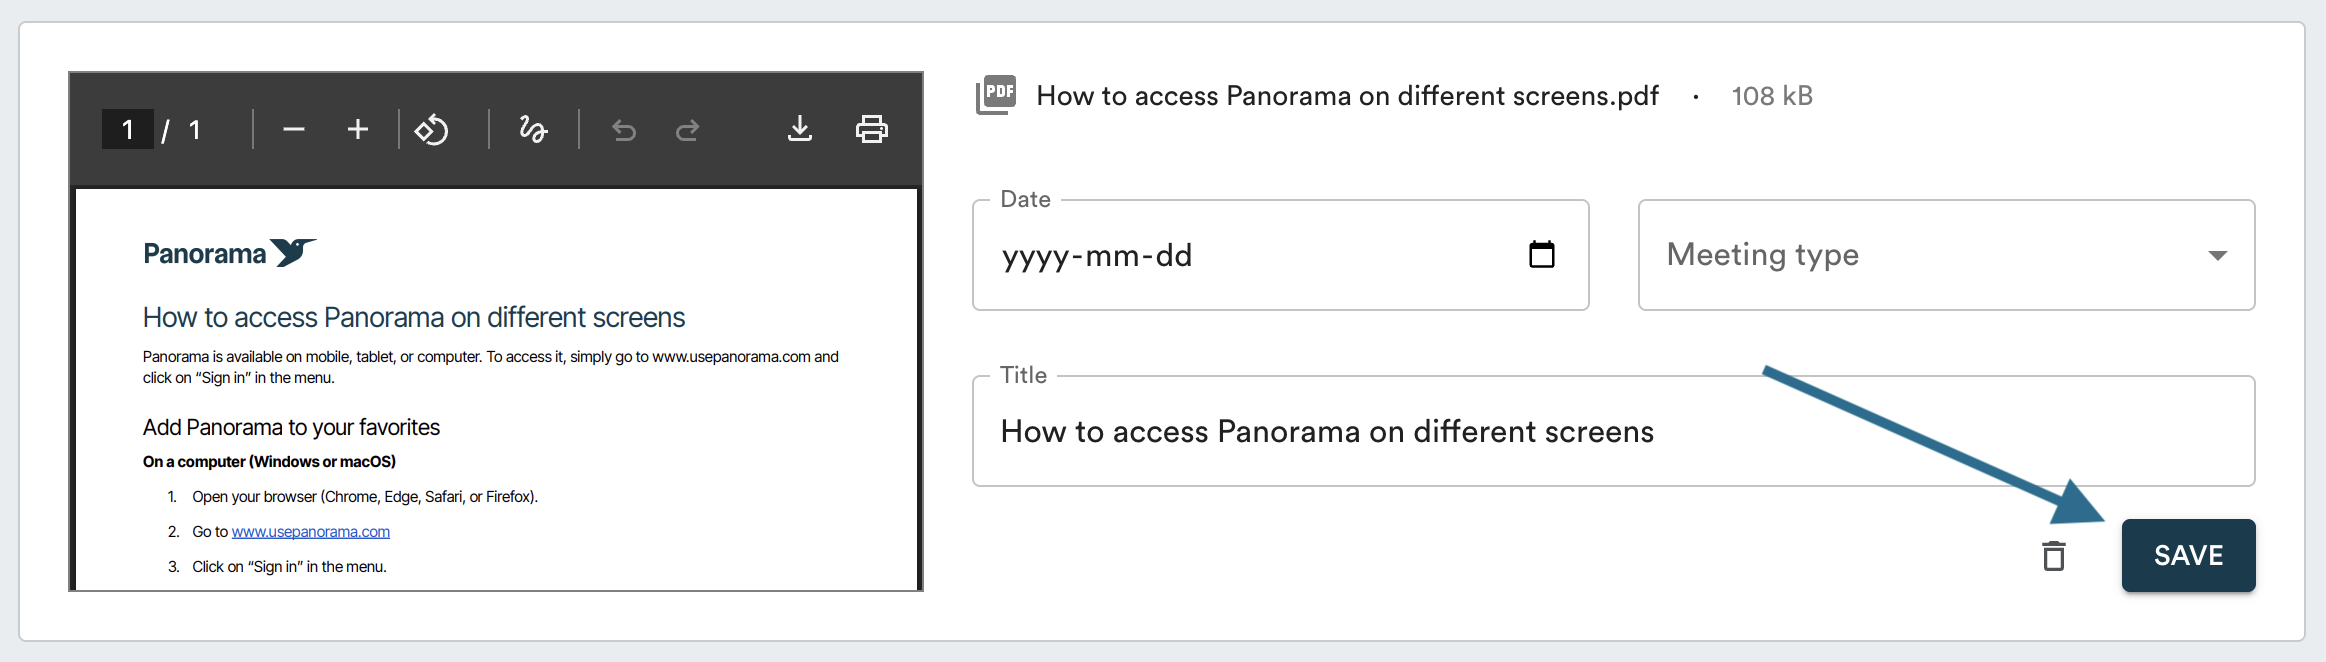
Go to the appropriate tab ("Meetings", "Minutes" or "Resolutions") and scroll to the bottom of the page. Click "Import", then select up to 5 files at a time.
![]()
Depending on the document type, you will be able to fill in:
- Agendas and minutes: the meeting date, meeting type and title
- Resolutions: the number, associated group and decision result
Click "Save" to add the document. The document will not be saved if you leave or refresh the page before clicking "Save".
For agendas with their related documentation: import the main file first, then add the attached documents once the agenda has been saved (up to 5 at a time).
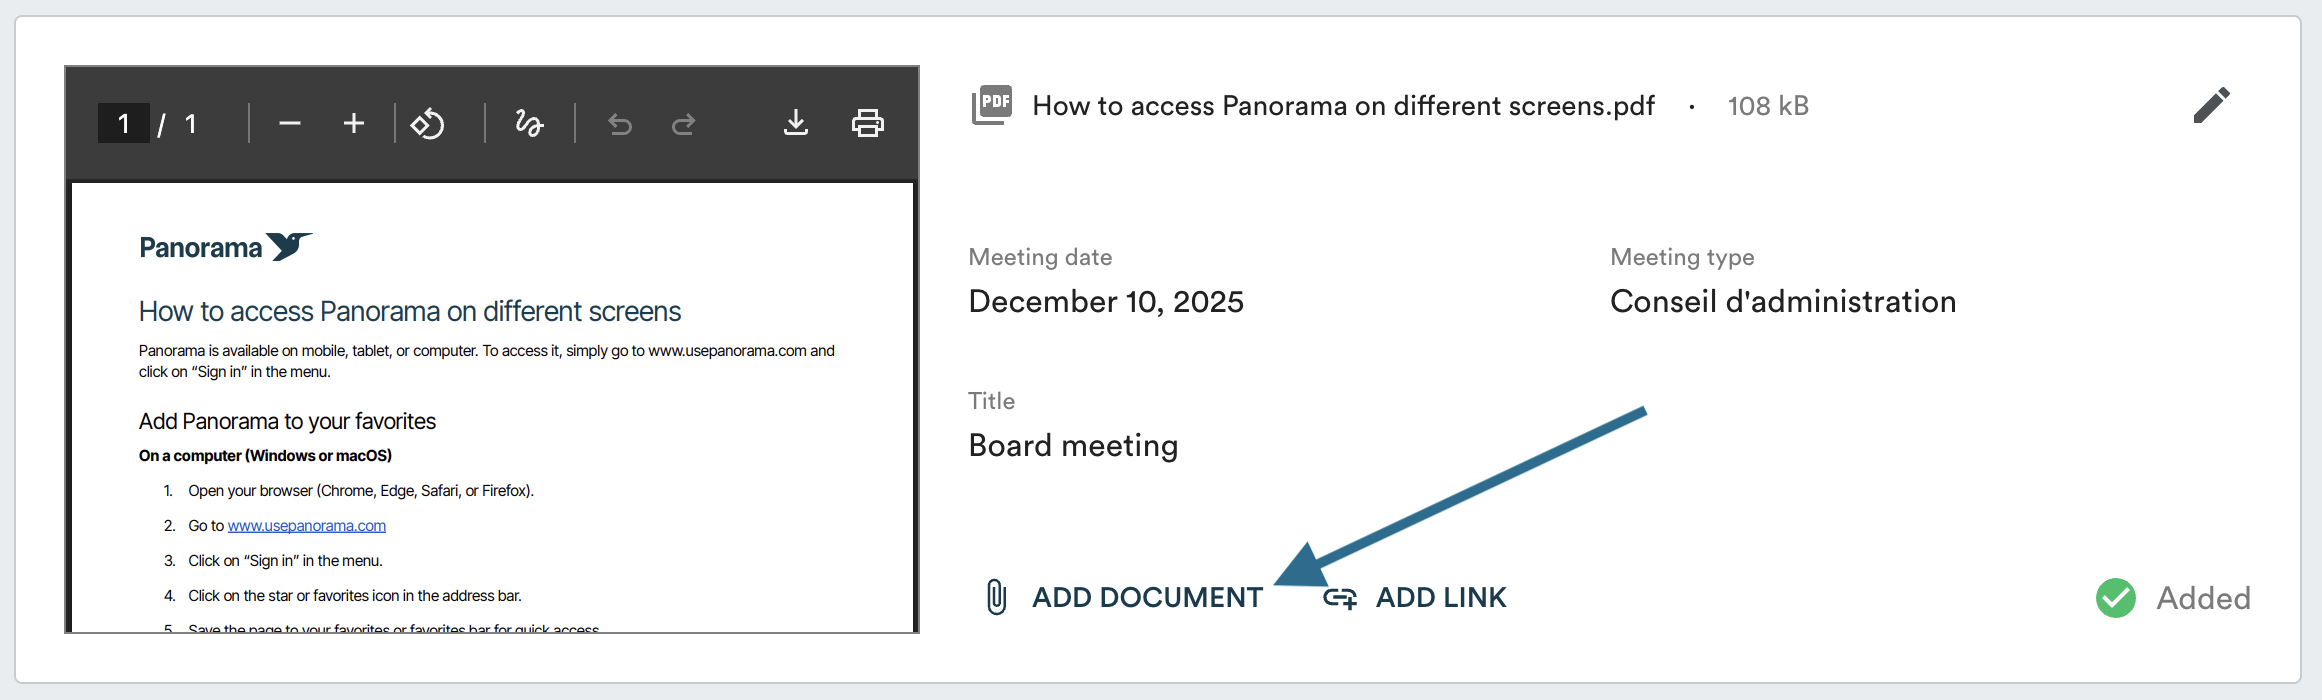
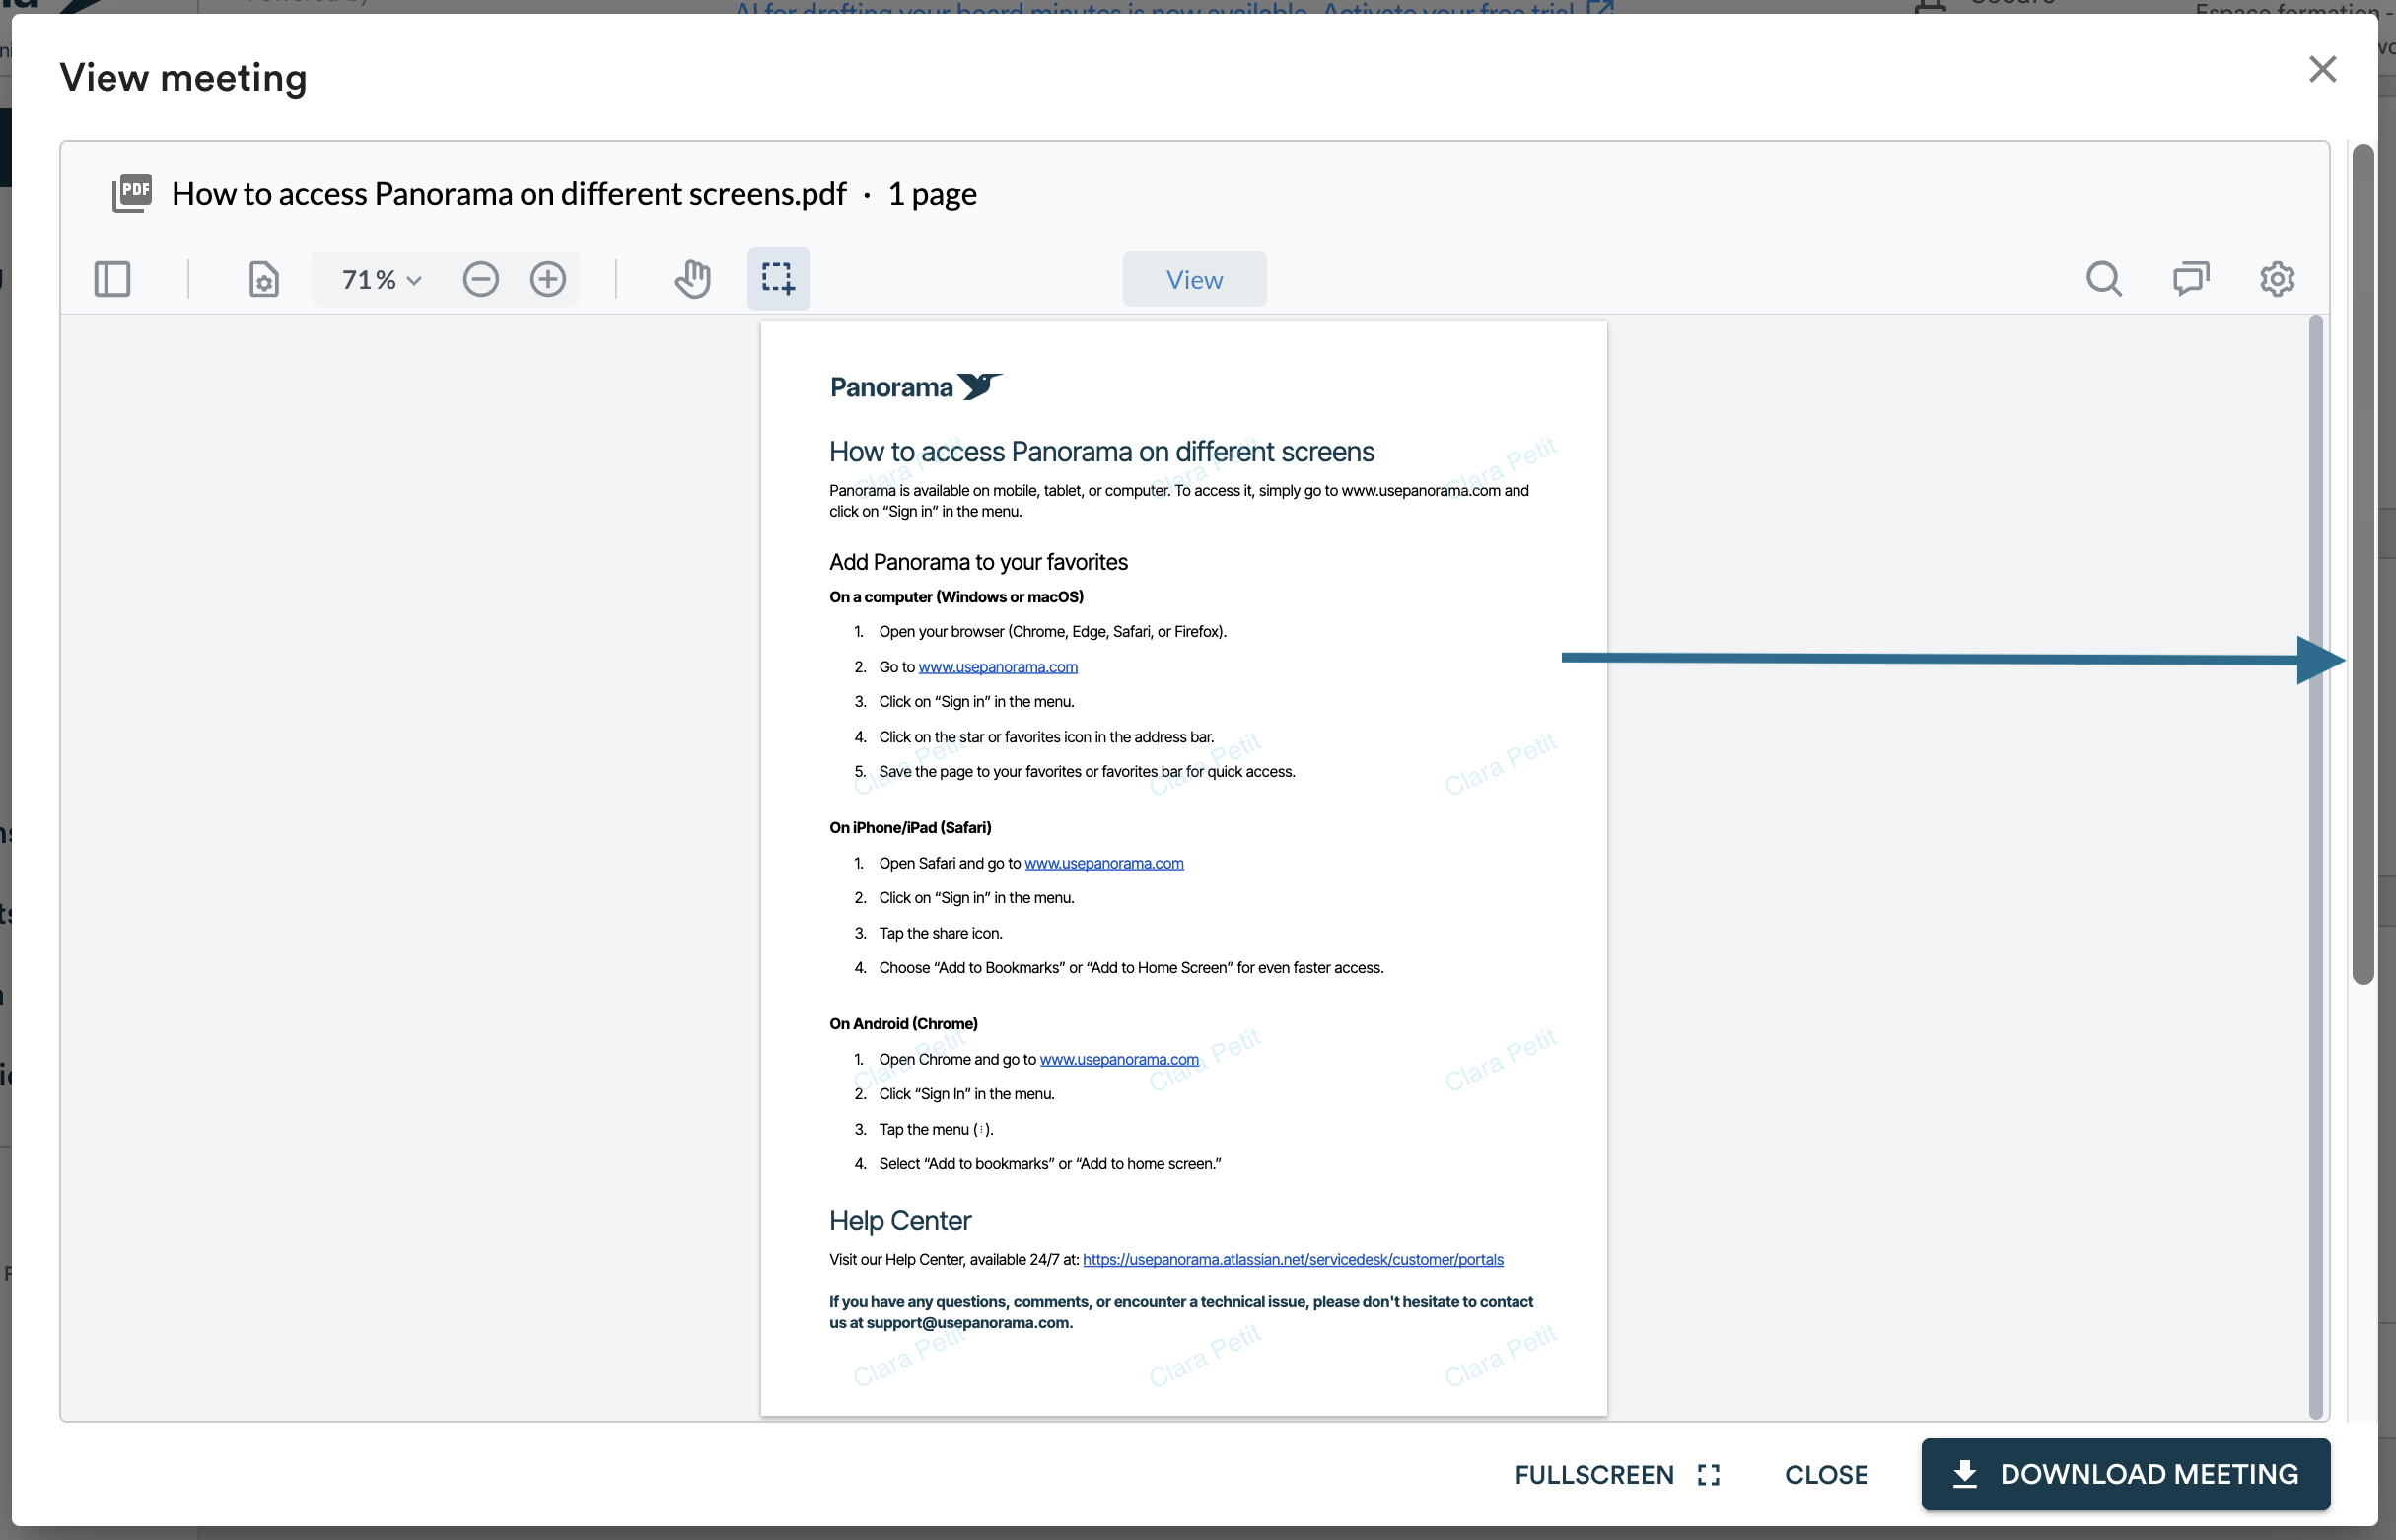
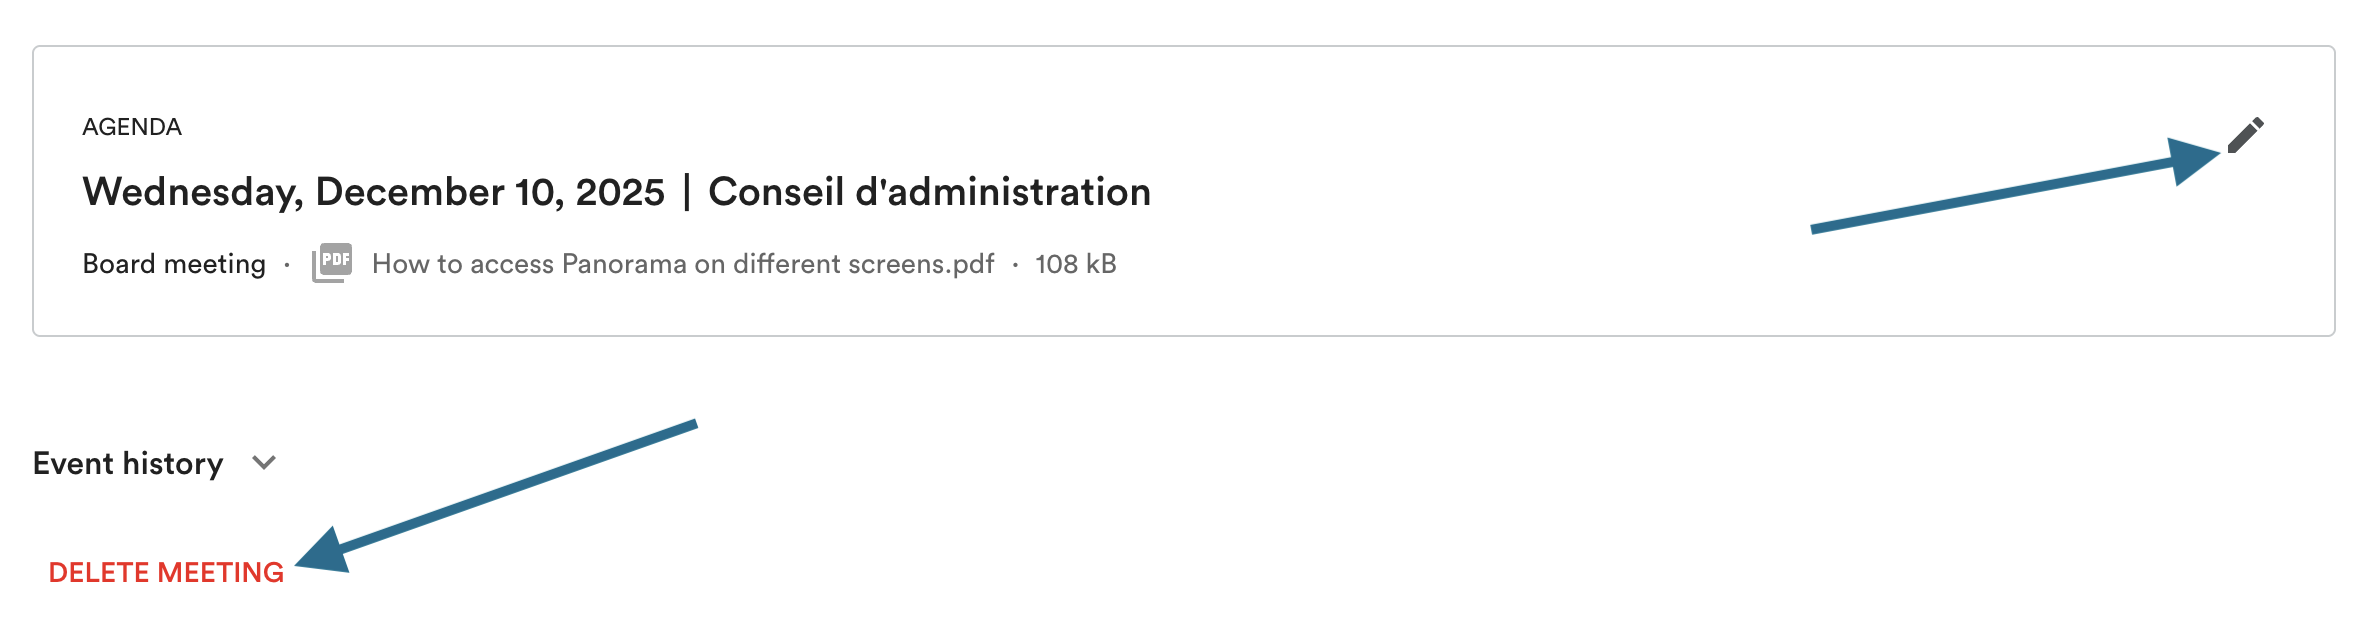
Once added, these documents remain editable. Click the pencil icon in the top right corner of the card to edit the date, meeting type or attached documents. By opening a document from your log, you can also view it (if it is a PDF), edit its details or delete it if you made an error.

Step 3: Add your reference documents
Only members with the appropriate permissions can add documents. To check your permissions, go to the "Organization" tab and select the relevant group. To modify them, contact your account owner or write to support@usepanorama.com.
The document centre is designed for your final, approved documents: policies, bylaws, procedures, etc. For working documents, we recommend attaching them directly to your agendas during board review. Once approved or formally adopted, the document can be added to the document centre.
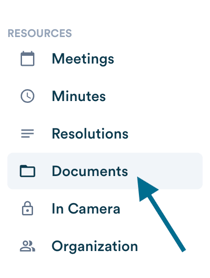
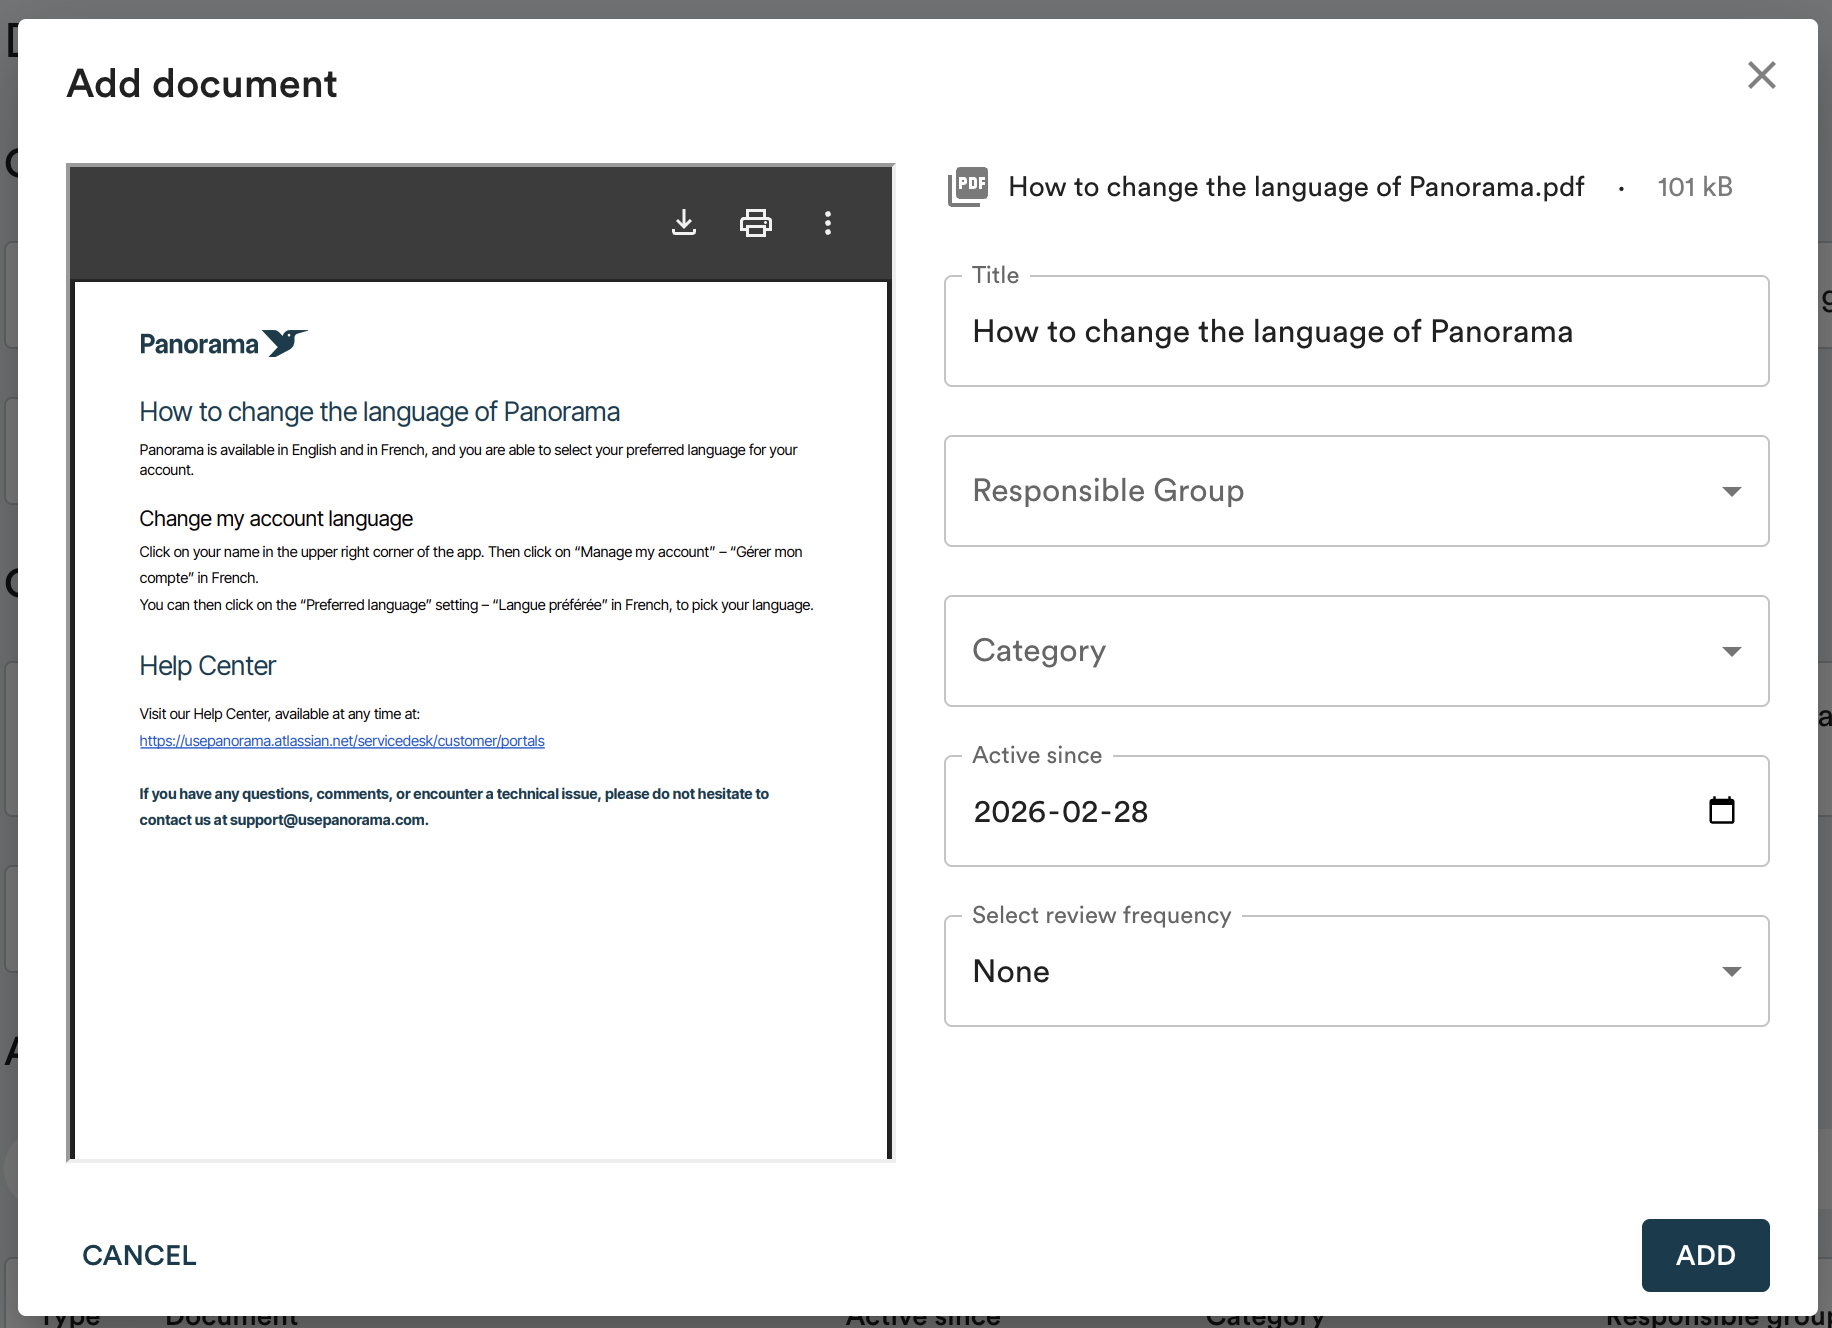
Navigate to the "Documents" tab in the left menu, then click "Add document" in the top right corner, or drop a file directly into the upload area at the bottom of the table.


Fill in the form:
- Responsible group: the committee in charge of the eventual review of the document. Access permissions vary by organization — some documents may be restricted to members of the relevant group only. In that case, any document that should be accessible to the full board should be placed under the "Board of Directors" group.
- Category: allows you to classify your documents for easy retrieval.
- Active since: the date of the last change made to the document. For example, if your bylaws have not been amended since 2020, enter the date they were adopted in 2020.
- Review frequency: (optional) Panorama will display a visual reminder when it is time to review the document. This frequency is calculated from the "Active since" date, or you can set a specific date using the "Custom" option. Panorama does not send email reminders for this.
Once a new version of a document has been approved, you can update it directly in Panorama.
Updating a document
When a new version is available, click "Update" on the document page.

Add the new file, enter the date from which this version is in effect, and adjust the review frequency as needed. By clicking "Submit", the document is updated and the previous version is automatically saved in the "History" section at the bottom of the page.
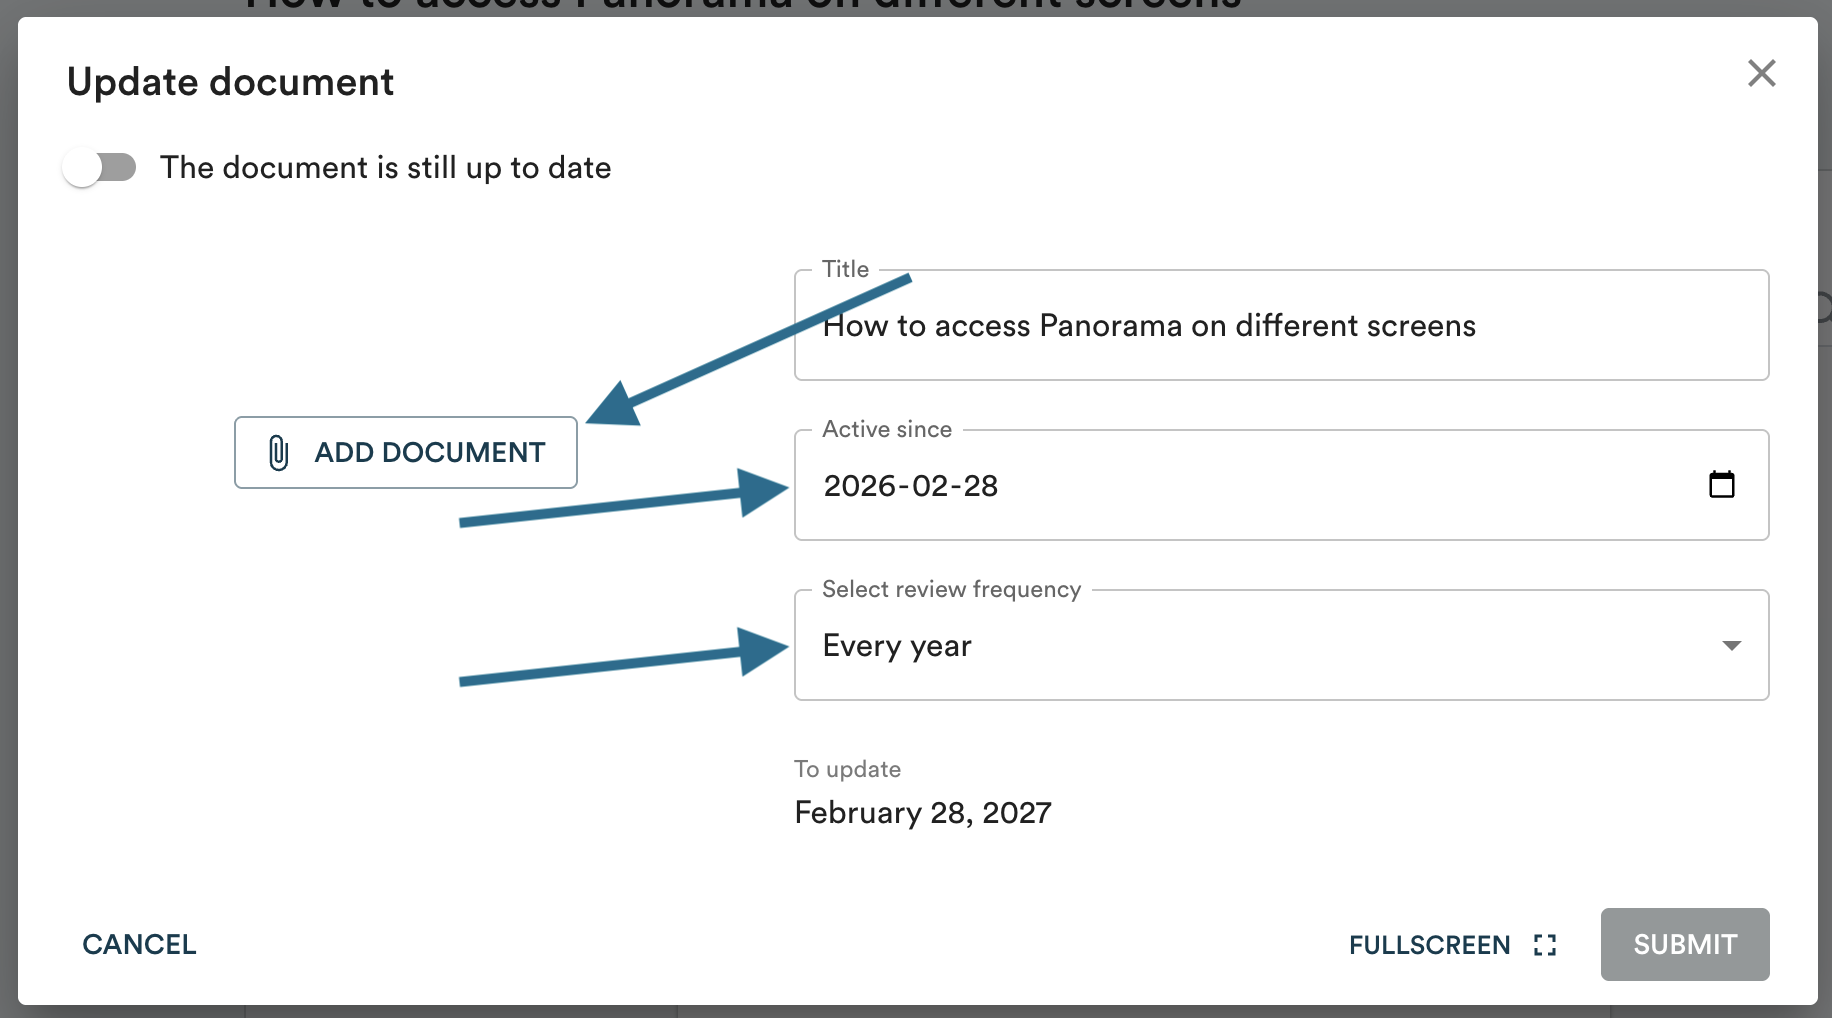
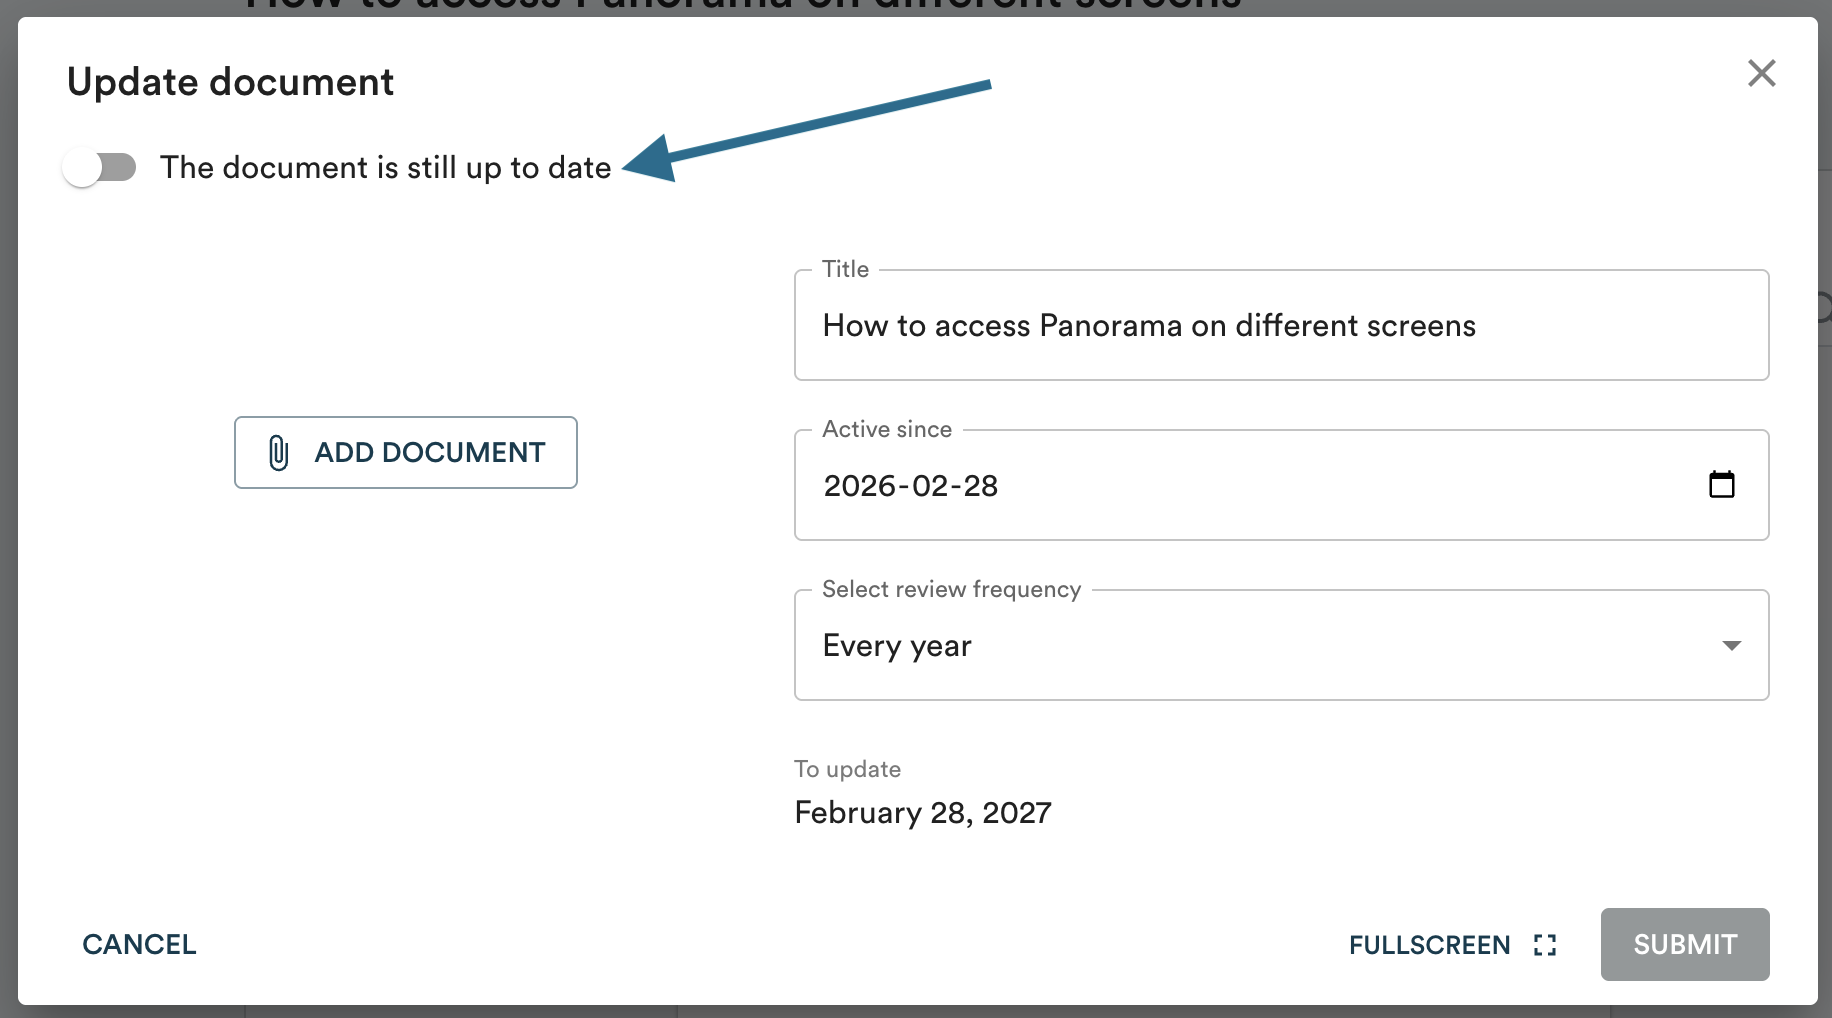
If the document has not changed but you want to postpone the review date, click "Update" and select "The document is still up to date".
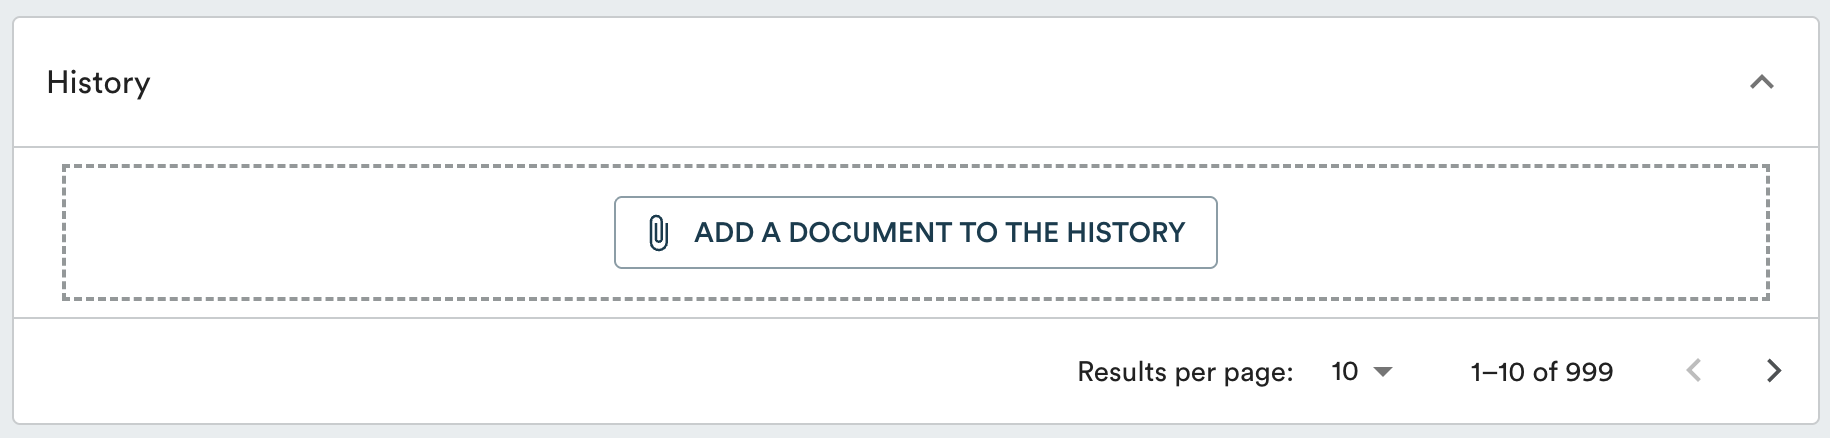
Adding document history retroactively
If you want to add previous versions of a document, click "Add a document to the history" at the bottom of the document page. You will be able to confirm the title and the date from which that version was active. The same permissions as for adding documents apply.
Deleting a document
To delete a document, scroll to the bottom of the document page and click "Delete document". If there are previous versions in the history, the most recent one will take its place.

The responsible group and category cannot be changed after a document has been added. If you made an error, delete the document and add it again with the correct information.